读取json格式文件
安装 Newtonsoft.Json 程序集
1. 选择界面下方的【程序包管理器控制台】页面,输入安装指令
Install-Package Newtonsoft.Json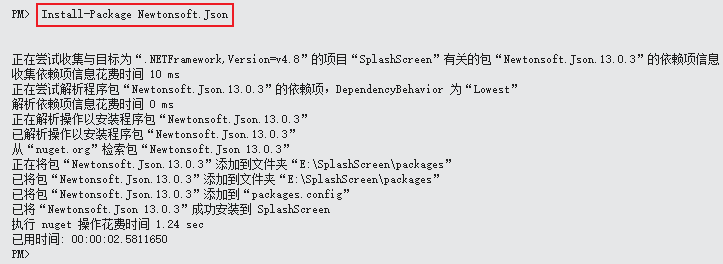
2. 安装完成后,请确保在代码文件的顶部包含以下 using 指令:
using Newtonsoft.Json;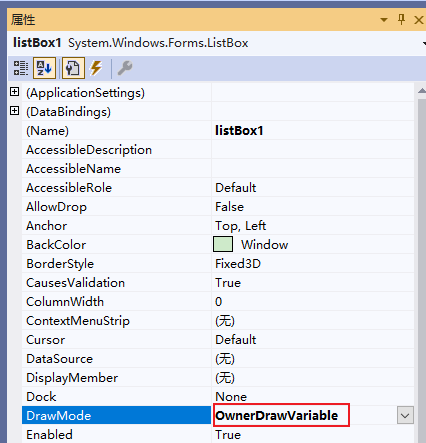
创建读取Json文件的类
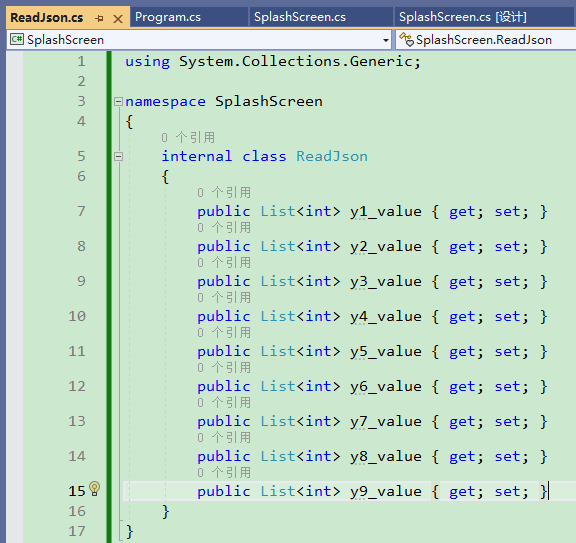
建立一个ReadJson.cs文件,内容如下:
- using System.Collections.Generic;
-
-
- namespace SplashScreen
- { internal class ReadJson
- {
- public List<int> y1_value { get; set; }
- public List<int> y2_value { get; set; }
- public List<int> y3_value { get; set; }
- public List<int> y4_value { get; set; }
- public List<int> y5_value { get; set; }
- public List<int> y6_value { get; set; }
- public List<int> y7_value { get; set; }
- public List<int> y8_value { get; set; }
- public List<int> y9_value { get; set; }
- }
- }

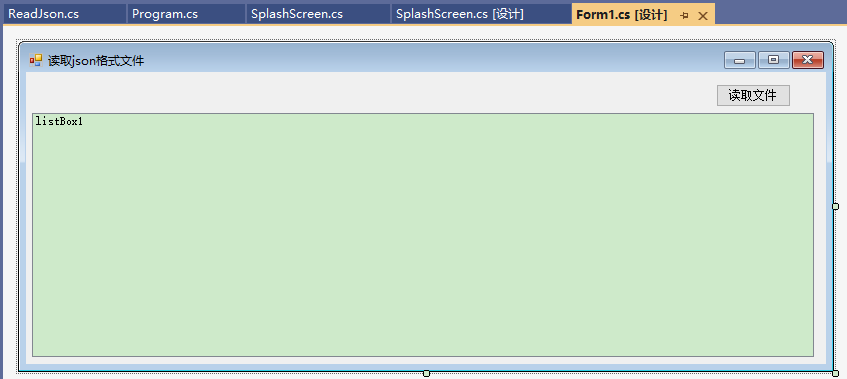
新建GUI界面
添加一个按钮和一个ListBox控件
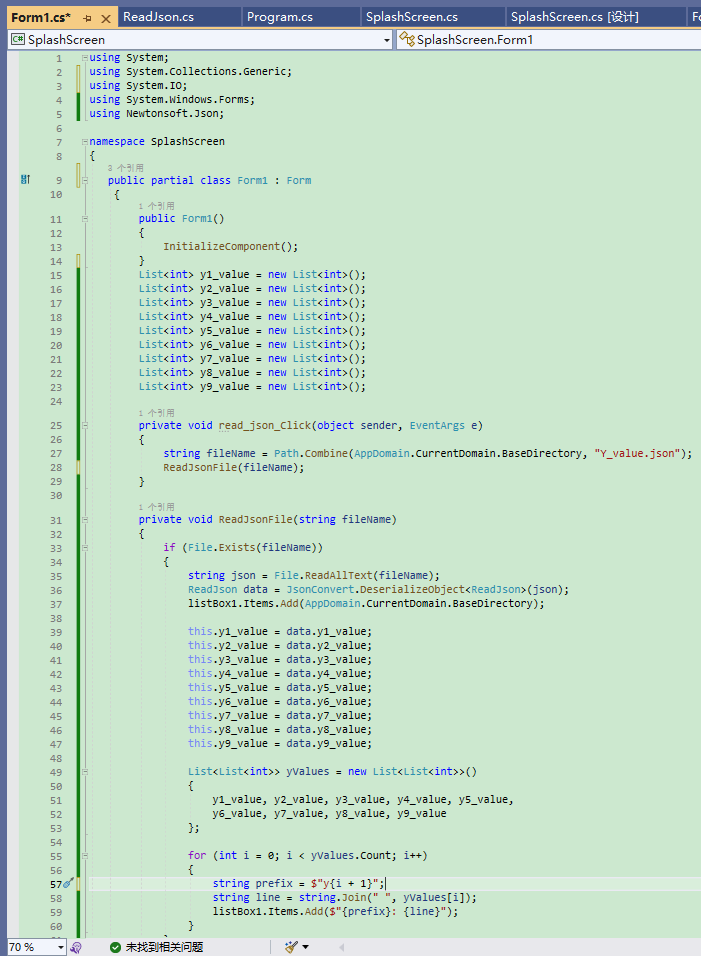
在Form1.cs中添加如下代码:
设置全局变量:
- List<int> y1_value = new List<int>();
- List<int> y2_value = new List<int>();
- List<int> y3_value = new List<int>();
- List<int> y4_value = new List<int>();
- List<int> y5_value = new List<int>();
- List<int> y6_value = new List<int>();
- List<int> y7_value = new List<int>();
- List<int> y8_value = new List<int>();
- List<int> y9_value = new List<int>();
读取文件按钮点击事件
- private void read_json_Click(object sender, EventArgs e)
- {
- string fileName = Path.Combine(AppDomain.CurrentDomain.BaseDirectory, "Y_value.json");
-
- ReadJsonFile(fileName);
- }
读取文件函数
- private void ReadJsonFile(string fileName)
- {
- if (File.Exists(fileName))
- {
- string json = File.ReadAllText(fileName);
- ReadJson data = JsonConvert.DeserializeObject<ReadJson>(json);
- listBox1.Items.Add(AppDomain.CurrentDomain.BaseDirectory);
-
- this.y1_value = data.y1_value;
- this.y2_value = data.y2_value;
- this.y3_value = data.y3_value;
- this.y4_value = data.y4_value;
- this.y5_value = data.y5_value;
- this.y6_value = data.y6_value;
- this.y7_value = data.y7_value;
- this.y8_value = data.y8_value;
- this.y9_value = data.y9_value;
-
- List<List<int>> yValues = new List<List<int>>()
- {
- y1_value, y2_value, y3_value, y4_value, y5_value,
- y6_value, y7_value, y8_value, y9_value
- };
-
- for (int i = 0; i < yValues.Count; i++)
- {
- string prefix = $"y{i + 1}";
-
- string line = string.Join(" ", yValues[i]);
- listBox1.Items.Add($"{prefix}: {line}");
- }
- }
- }
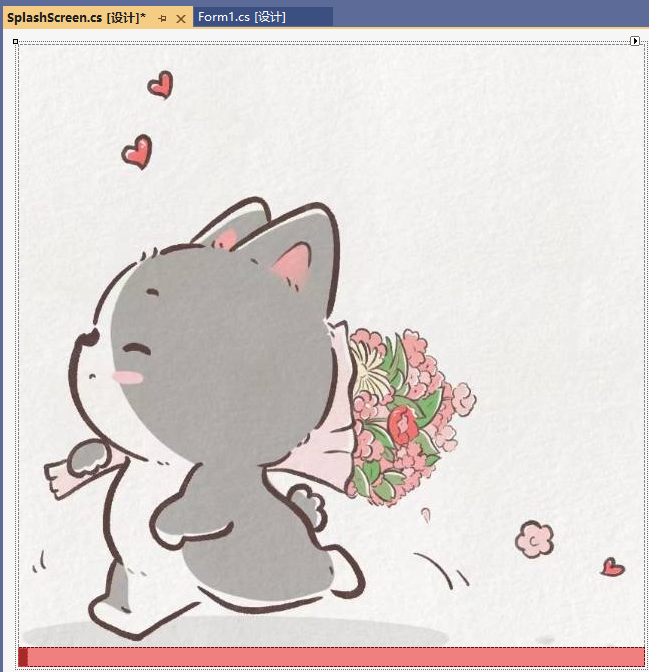
制作一个模拟的启动界面
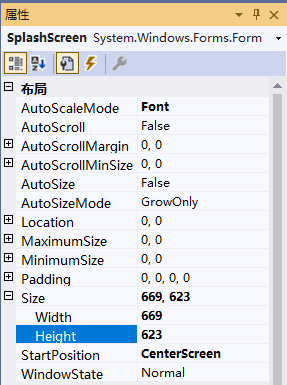
新建一个Form,命名为SplashScreen。
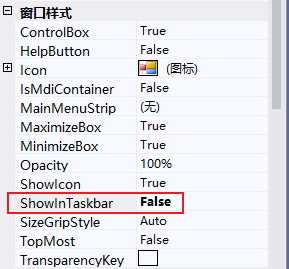
不显示任务栏图标
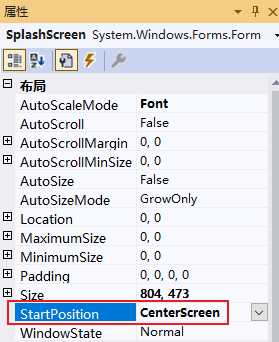
程序置于屏幕中央
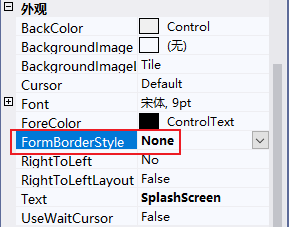
取消窗体边框
设置窗体尺寸,可以设为与图片尺寸相同,也可以设置图片的显示方式
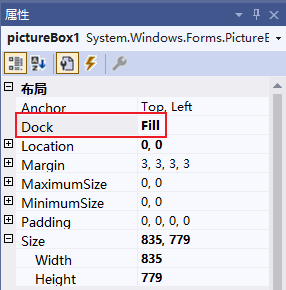
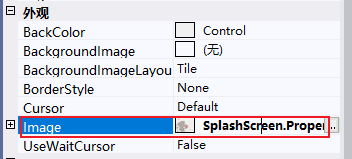
添加图片框控件,并设置布局Dock为填充
添加资源文件
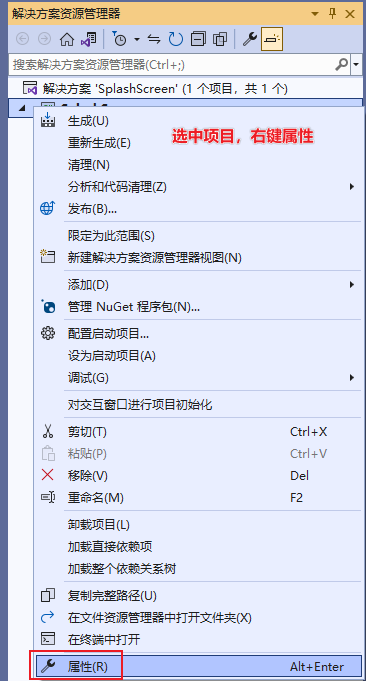
选中项目,右键选择属性
属性窗口中选择资源那一栏,选择图像,添加资源——>添加现有文件
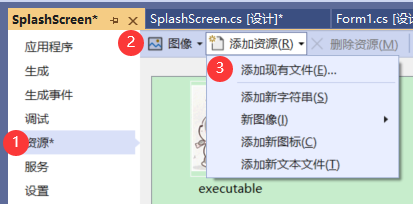
图片控件导入图片
在界面下方添加一个Panel控件,设置Dock属性为Bottom
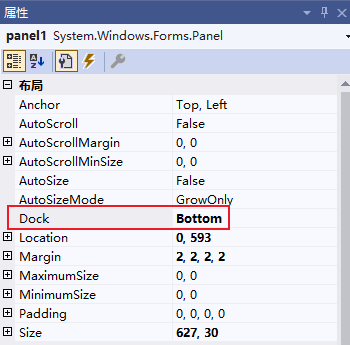
再添加一个Panel控件,放在Panel1控件里面,左侧
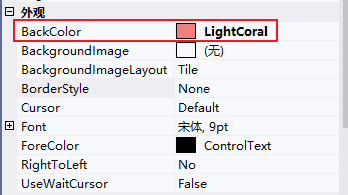
设置两个Panel的背景颜色
添加一个定时器控件
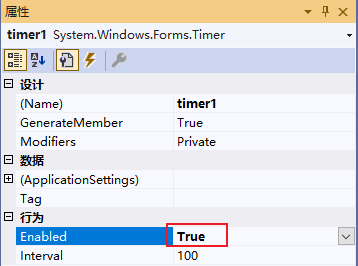
添加定时器的响应事件代码
- private void timer1_Tick(object sender, EventArgs e)
- {
- panel2.Width += 5;
- if (panel2.Width >= panel1.Width)
- {
- timer1.Stop();
- this.DialogResult = DialogResult.OK;
- this.Close();
- }
- }
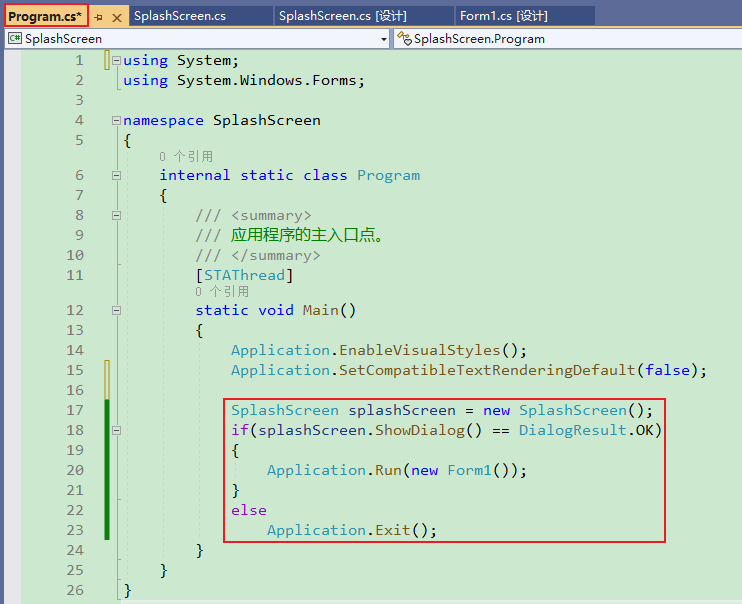
启动界面加载完成后加载主程序界面
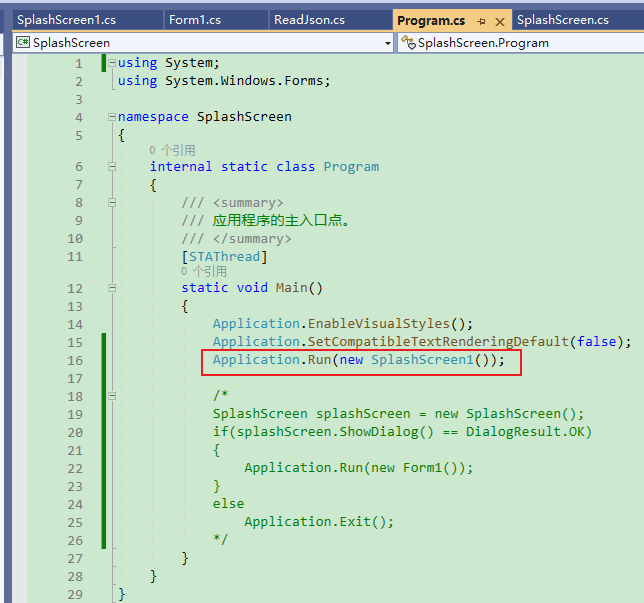
方法一:Program.cs中添加如下代码:
- SplashScreen splashScreen = new SplashScreen();
- if(splashScreen.ShowDialog() == DialogResult.OK)
- {
- Application.Run(new Form1());
- }
- else
- Application.Exit();
方法二:
- using System;
- using System.Windows.Forms;
-
- namespace SplashScreen
- {
- public partial class SplashScreen : Form
- {
- private Form1 form1;
-
- public SplashScreen()
- {
- InitializeComponent();
- form1 = new Form1();
- }
-
- private void timer1_Tick(object sender, EventArgs e)
- {
- panel_progressbar.Width += 5;
- if (panel_progressbar.Width >= panel_contant.Width)
- {
- timer1.Stop();
- this.Hide();
- form1.ShowDialog();
- this.Close();
- }
- }
-
- private void SplashScreen_Load(object sender, EventArgs e)
- {
- timer1.Start();
- }
- }
-
- }
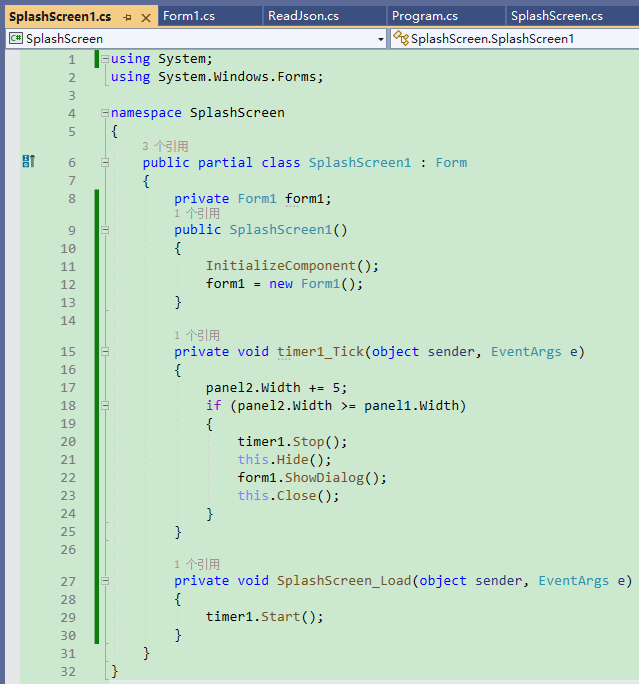
方法二:
启动界面代码如下:
- using System;
- using System.Windows.Forms;
-
- namespace SplashScreen
- {
- public partial class SplashScreen1 : Form
- {
- private Form1 form1;
- public SplashScreen1()
- {
- InitializeComponent();
- form1 = new Form1();
- }
-
- private void timer1_Tick(object sender, EventArgs e)
- {
- panel2.Width += 5;
- if (panel2.Width >= panel1.Width)
- {
- timer1.Stop();
- this.Hide();
- form1.ShowDialog();
- this.Close();
- }
- }
-
- private void SplashScreen_Load(object sender, EventArgs e)
- {
- timer1.Start();
- }
- }
- }
Program.cs中代码